Aluminum window installation problems usually trace back to poor substrate prep, incorrect fixings, or thermal bridging errors. This guide lists common symptoms, identifies root causes, and provides practical repair solutions to ensure a durable, airtight fit.
- Check substrate flatness and squareness before fixing any frame to prevent stress cracking.
- Use the correct fixing type and spacing to avoid thermal bridging and air leakage.
- Inspect the weep hole and drainage path after installation to prevent water ingress.
- Document every installation defect and repair for warranty and future maintenance purposes.
Understanding the Core Issue
Aluminum window installation failures rarely stem from the frame itself. They come from the interface between the frame and the building fabric. A high-quality unit can fail quickly if the rough opening is out of square, the fixings are over-tightened, or the thermal break is compromised.
Professionals on site often treat the frame as a finished product. It is not. It is a structural and thermal component that must be protected during the build. The most common defects appear weeks or months after handover, once thermal cycles and weather pressure test the installation.
This guide focuses on practical troubleshooting. It lists the symptoms you will see, the likely causes, and the actions you should take. It is written for buyers, engineers, and site supervisors who need to resolve problems before they become structural or warranty claims.
The Defects You Will See Most Often
Installation defects in aluminum windows fall into a few predictable patterns. Water ingress is the most common complaint. It usually starts as a small stain at the bottom of the sash or along the exterior sill.
Air leakage is the second most frequent issue. You will hear whistling, feel drafts, or see condensation on the glass. This indicates a failure in the weather stripping or the sealant bed.
Mechanical problems appear as sticking sashes, difficult operation, or visible frame distortion. These are often caused by fixing stress or a substrate that shifted after the frame was set.
| Symptom | Likely cause | What to do |
|---|---|---|
| Water stains at sash bottom | Blocked weep hole or failed drainage gap | Clear debris from weep hole and check the external sill slope |
| Air whistling at joints | Compressed or missing gasket | Inspect the internal and external seals for damage or misalignment |
| Sash sticking or binding | Frame out of square or over-tightened fixings | Check fixing torque and loosen any fixings that are distorting the frame |
| Visible frame gap at wall | Substrate movement or insufficient shimming | Re-secure the frame with correct shims and verify the substrate is stable |
| Condensation between glass panes | Failed factory seal or installation impact | Assess if the unit is damaged; if not, check for thermal break integrity |
| Corrosion on fixings or frame | Using wrong fastener material or exposed to moisture | Replace with stainless steel or anodized fixings and re-apply protective sealant |
Substrate Preparation and Fixing Errors
The substrate is the foundation. If the wall or floor is not level, the frame will twist. Aluminum is strong, but it is not self-correcting. If you fix a frame into a crooked opening, the stress will show up as a gap, a crack, or a warped sash.
Before installation, measure the rough opening. Check for level, plumb, and square. Use shims to correct minor deviations. Do not rely on the frame itself to bridge a gap. Shims should be placed at the top, bottom, and sides, not just at the corners.
Fixing is where most problems start. Over-tightening a fixing screw compresses the frame and breaks the thermal break. Under-tightening allows the frame to move. Use the torque specifications provided by the manufacturer. If they are not available, follow the rule of thumb: tighten until the frame is secure, but stop if you feel significant resistance.
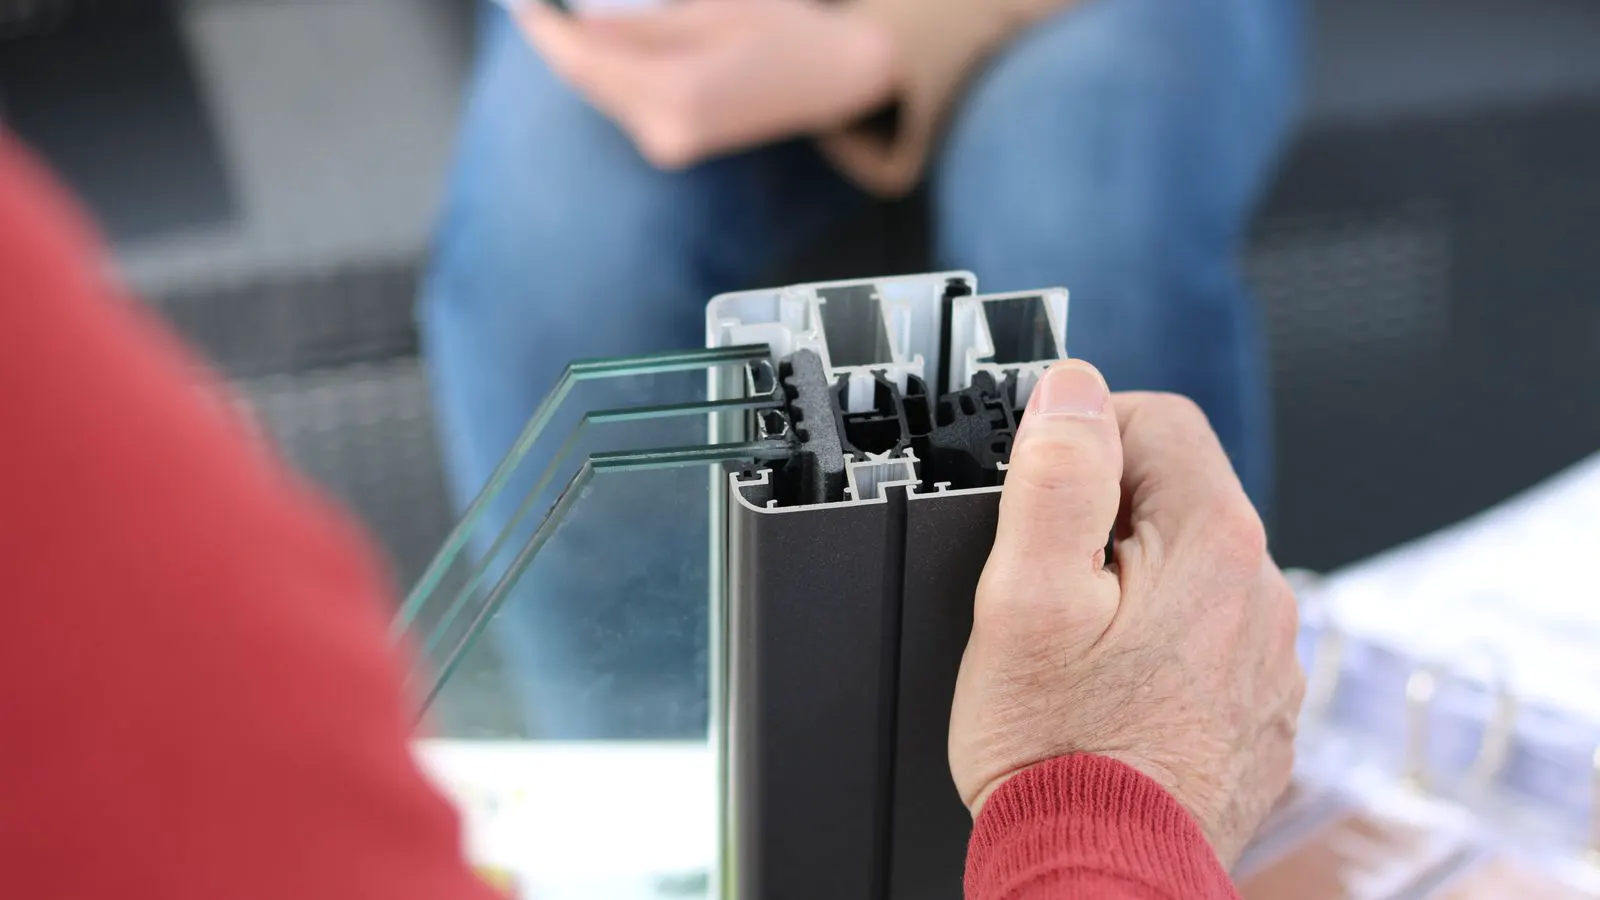
Do not fix the frame through the thermal break if the design allows for a separate fixing plate. Many modern systems use a dedicated fixing rail that avoids the aluminum profile. If you drill through the main frame, you create a bridge for heat and a path for moisture.
Thermal Bridging and Air Leakage
Air leakage is more than an comfort issue. It reduces energy performance and can cause mold growth. In aluminum windows, air leakage often happens where the frame meets the wall, or where the sash meets the frame.
Check the weather stripping. It is a small part, but it does the heavy lifting. If the rubber or EPDM gasket is compressed during installation, it will not seal. If it is stretched or missing, air will pass through.
Inspect the sealant bed. The gap between the frame and the wall is filled with sealant. This must be continuous. If the sealant is applied in one long bead without breaks, it can crack as the building settles. Apply it in sections, or use a flexible sealant that can move.
Thermal bridging is a silent defect. You will not see it, but you will feel it in energy bills. If the frame is fixed directly through the thermal break, the insulation is compromised. Check the fixing method. If it is a through-fixing, assess if it can be replaced with a non-thermal fixing plate. If not, document the issue and plan for a retrofit.
Water Management and Drainage
Water is the enemy of any window installation. Aluminum is resistant to rust, but it is not waterproof. The frame has a specific drainage path. Water enters the sash area, flows down the channels, and exits through the weep hole.
If the weep hole is blocked, water backs up. This can cause rot in the interior lining or corrosion in the frame. Clear the weep hole before and after installation. Check for debris, sealant, or construction dust.
The external sill must slope away from the building. If the sill is flat or slopes inward, water will pool against the frame. This is a site issue, not a window issue, but it affects the installation. Check the sill before you fix the frame. If it is wrong, fix the substrate first.
Check the internal drainage too. Water should not enter the interior. If it does, it will damage the walls and furniture. Inspect the internal sealant and gaskets. If water is entering, the problem is likely a gap in the sealant or a damaged gasket.
Operational Problems and Mechanical Failures
A window that sticks is a window that is not being used. People will force it, which breaks the gaskets and the hardware. Sticking is usually caused by one of three things: the frame is not square, the sash is misaligned, or the fixings are too tight.
Check the frame square first. If the frame is twisted, the sash will rub against the frame rail. Loosen the fixings, correct the square, and re-tighten. Do not force the sash. If it is still sticking, check the gaskets. They may be compressed or dirty.
Check the hardware. The rollers and locks must be aligned. If the hardware is worn or misaligned, the sash will not lock properly. Adjust the rollers if the system allows. If not, replace the hardware.
Do not ignore operational problems. They get worse over time. A stuck sash will eventually break the gasket. A broken gasket will allow water in. A water ingress will cause mold. Fix the operation now to avoid a bigger repair later.
Prevention Tips for Site Supervisors
Prevention is cheaper than repair. Train the installation team on the specific system they are installing. Do not use generic procedures. Follow the manufacturer’s manual.
Check the substrate before installation. Reject any rough opening that is out of square by more than the tolerance allowed in the specification. Do not let the installers bridge a gap with the frame.
Use the correct fixings. Do not substitute screws. Use the provided fixings and the correct torque. If you do not have a torque driver, use the manufacturer’s instructions.
Inspect the sealant application. Do not allow continuous beads of sealant. Apply it in sections. Check the weep hole. Clear it before and after installation.
Document everything. Take photos of the substrate, the fixing method, and the sealant application. If a defect appears later, you will know what was done. This protects the buyer and the installer.
When to Replace, Not Repair
Some defects are not worth repairing. If the frame is bent or cracked, replace it. If the thermal break is broken and cannot be fixed, replace the unit. If the sealant bed is compromised over a large area, consider replacing the sealant or the frame.
Do not try to hide a defect. Use a patch or a cosmetic fix. This will fail. The defect will return. Replace the component or the unit.
If the problem is recurring on multiple units, stop the installation. Check the substrate, the fixings, and the training. A pattern of defects is a system failure, not a one-off mistake.
Frequently asked questions
Can I fix a stuck sash by tightening the fixing screws?
No. Tightening fixings will distort the frame and make the sticking worse. You must loosen the fixings, check the square, and then re-tighten to the correct torque.
What is the best sealant for aluminum window installations?
Use a flexible, low-movement sealant that is compatible with aluminum. Check the manufacturer's recommendation. Avoid rigid sealants that will crack as the building settles.
How do I know if the thermal break is compromised?
Check the fixing method. If you fixed through the main frame profile, the thermal break is likely compromised. Look for cold spots on the frame in winter or condensation on the frame.
Should I paint the aluminum frame after installation?
Only if the frame is not pre-finished. Most modern aluminum windows are anodized or powder-coated. Painting can damage the finish and void the warranty.
How long does a weep hole blockage take to cause damage?
It depends on the weather and the drainage path. In heavy rain, water can back up quickly. Check the weep hole after the first major rain event to ensure it is clear.